Metal roofing offers exceptional strength, durability, and energy efficiency, making it a popular choice for homeowners seeking long-lasting and low-maintenance solutions for their properties.
1.1 What is a Metal Roof?
A metal roof is a durable and versatile roofing system made from materials such as steel, aluminum, zinc, or copper. It is designed to provide long-lasting protection against weather conditions, including rain, snow, hail, and extreme temperatures. Metal roofs come in various styles, such as corrugated panels, standing seam, and metal shingles, offering both functional and aesthetic appeal; They are known for their strength, low maintenance, and energy efficiency, making them a popular choice for homeowners and builders. Unlike traditional asphalt shingles, metal roofs are fire-resistant, eco-friendly, and can last for 40 to 70 years or more. Their sleek designs and range of finishes allow them to complement various architectural styles, from modern to rustic homes.
1.2 Benefits of Metal Roofing
Metal roofing offers numerous benefits, including exceptional durability, energy efficiency, and low maintenance. It is resistant to weather damage, fire, and pests, ensuring a secure and long-lasting roof. Metal roofs can last 40 to 70 years, far exceeding traditional materials. Their reflective properties reduce heat absorption, lowering energy costs and improving home comfort. Additionally, metal roofs are eco-friendly, as they can be made from recycled materials and are fully recyclable at the end of their lifecycle. They also provide a sleek, modern appearance, enhancing curb appeal. With minimal upkeep and superior performance, metal roofing is a cost-effective and sustainable choice for homeowners seeking a reliable and stylish roofing solution.

Planning and Preparation
Proper planning ensures a smooth installation process, starting with accurate measurements and obtaining necessary permits, followed by selecting the right materials and tools for the job.
2.1 Measuring Your Roof
Accurate measurements are crucial for a successful metal roof installation. Measure the length, width, and rise of each roof section to determine the total area. Use a tape measure to record these dimensions, ensuring precision to avoid material shortages or excess. Consider roof pitch and any unique features like valleys or vents, as they may require additional materials. Record all measurements clearly and use them to order panels and accessories. Proper sizing ensures a seamless fit and prevents costly delays during installation. Always double-check measurements for accuracy before placing orders.
2.2 Obtaining Necessary Permits
Before starting your metal roof installation, ensure you obtain all required permits from your local government. Permits are essential to guarantee compliance with building codes and safety standards. They regulate structural integrity, fire resistance, and environmental impact. Secure permits for roof replacement, electrical work, or plumbing if applicable. Failure to obtain permits may result in fines, project halts, or even removal of the roof. Requirements vary by location, so contact your local building department to confirm specifics. Once approved, keep permits accessible for inspections. Proper documentation ensures a smooth process and avoids legal complications; Addressing permits early prevents delays and ensures your project adheres to regulations.
2.3 Choosing the Right Metal Type
Selecting the appropriate metal type for your roof is crucial for durability, appearance, and performance. Common options include galvanized steel, aluminum, copper, and zinc. Galvanized steel is cost-effective and rust-resistant, while aluminum is lightweight and corrosion-proof. Copper and zinc offer premium aesthetics and longevity but are more expensive. Consider factors like climate, budget, and desired appearance when making your choice. Ensure the metal type aligns with local building codes and complements your home’s architectural style. Additionally, evaluate the thickness and finish of the metal to meet your specific needs. Proper selection ensures optimal functionality and enhances your home’s curb appeal, making it a worthwhile investment in the long run.
Safety Considerations
Safety is paramount when installing a metal roof. Always wear personal protective equipment, including a hard hat, gloves, and safety harness. Ensure proper measures are in place to prevent accidents and injuries during the installation process.
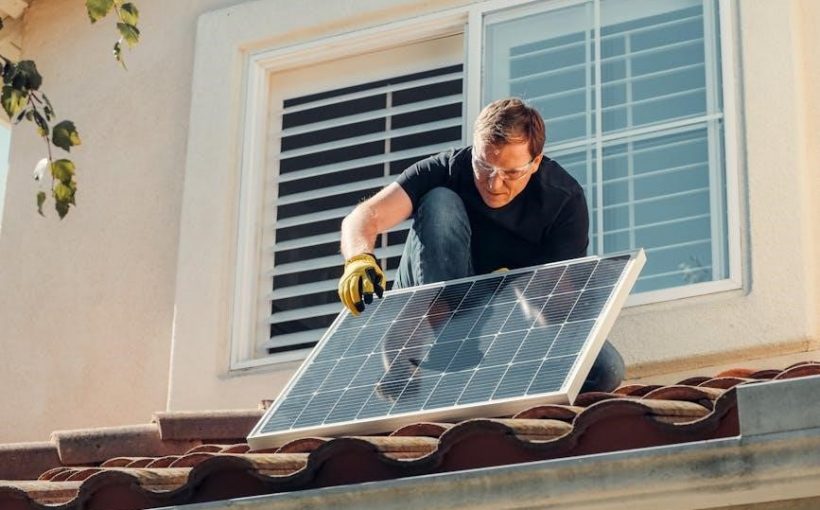
3.1 Personal Protective Equipment
Protecting yourself is crucial when installing a metal roof. Essential personal protective equipment includes a hard hat, safety glasses, gloves, and steel-toe boots. A harness is also recommended to prevent falls. Always wear high-visibility clothing to stay noticeable. Ensure all gear fits properly and is in good condition. Regularly inspect equipment for damage or wear. Proper PPE helps prevent injuries from falling objects, sharp metal edges, and slippery surfaces. Never start work without it, as it is your first line of defense against accidents. Remember, safety should never be compromised for convenience or speed.
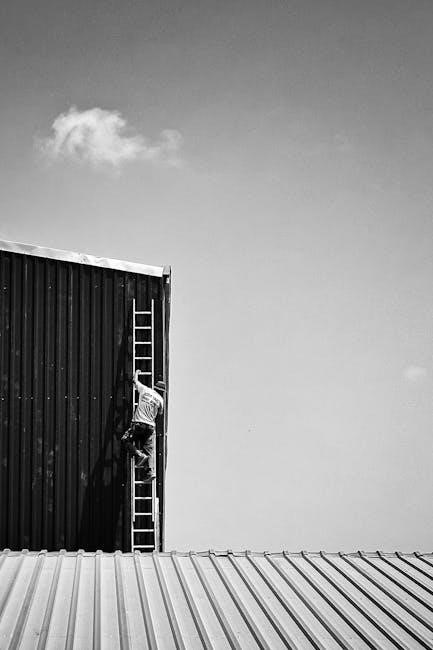
3.2 Setting Up Safety Measures
Setting up safety measures is vital to ensure a secure working environment during metal roof installation. Begin by securing ladders and scaffolding firmly to prevent movement. Install guardrails around roof edges to prevent falls and use safety nets if necessary. Always ensure the roof structure can support the weight of workers and materials. Properly anchor fall protection systems, such as harnesses, to sturdy points. Clear the area of debris and ensure good lighting for visibility. Regularly inspect all equipment and tools for damage. Establish clear communication among team members and assign a supervisor to monitor safety protocols. Proper setup of these measures significantly reduces the risk of accidents and ensures a smooth installation process.
Preparing the Roof Structure
Inspect the roof for damage or rot and remove old roofing materials. Ensure structural integrity by reinforcing beams if necessary. Clean and level the surface thoroughly.
4.1 Inspecting the Existing Roof
Before installing a metal roof, inspect the existing structure thoroughly. Check for signs of damage, rot, or deterioration in rafters, trusses, and decking. Ensure all components are secure and level. Look for any sagging areas, cracks, or gaps that could compromise the roof’s integrity. If damaged sections are found, they must be repaired or replaced to provide a stable base for the metal panels. Additionally, verify that the roof’s framing can support the weight of the metal roofing material. This step is crucial to ensure a safe and durable installation. Proper inspection prevents future issues and ensures a solid foundation for your new metal roof.
4.2 Repairing and Reinforcing the Structure
Once the inspection is complete, address any damage or weaknesses. Replace rotten or warped wood with durable, treated materials. Secure loose connections and tighten any fasteners. If necessary, add additional supports to ensure the roof structure is sturdy. For areas with significant damage, consider reinforcing with plywood or steel brackets. Apply a waterproof sealant to any gaps or cracks to prevent leaks. Ensure the roof deck is even and properly aligned before proceeding. Reinforcing the structure guarantees a stable base for the metal roofing system, preventing future issues like sagging or uneven panels. A well-prepared roof ensures a smooth and durable installation process.
Installing the Underlayment
The underlayment is a critical layer installed directly on the roof deck before metal panels. It provides insulation, protects against weather, and enhances the roof’s durability and energy efficiency.
5.1 Selecting the Right Underlayment
Selecting the right underlayment is crucial for a successful metal roof installation. It acts as a barrier between the roof deck and the metal panels, providing insulation, weather protection, and noise reduction. Common underlayment materials include felt paper, synthetic underlayment, and radiant barrier options. Felt paper is a traditional choice, while synthetic underlayment offers superior durability and water resistance. Radiant barriers are ideal for reflecting heat in warmer climates. Consider factors like climate, budget, and local building codes when choosing. Ensure the underlayment is compatible with your metal roofing type and meets fire-resistance standards. Proper selection enhances the roof’s performance, longevity, and energy efficiency, making it a critical step in the installation process.
5.2 Applying the Underlayment
Applying the underlayment is a critical step in metal roof installation. Begin by ensuring the roof deck is clean, dry, and free of debris. Start at the eave edge, rolling out the underlayment material and securing it with compatible fasteners or adhesive, depending on the type. Overlap each course by 6-12 inches to ensure watertight coverage. Use a chalk line to align the underlayment evenly across the roof surface. Cut material as needed around vents, skylights, and other obstructions. Secure edges and overlaps tightly to prevent wind uplift. Apply self-sealing tape at seams for added protection. Ensure the underlayment is smooth and wrinkle-free to provide a stable base for metal panels. Proper installation ensures optimal performance and longevity of the roofing system.
Installing Metal Roof Panels
Install metal roof panels starting with eave panels, ensuring alignment and secure fastening to purlins. Proceed methodically, overlapping panels as specified, to maintain structural integrity and weatherproofing.
6.1 Starting with Eave Panels
Begin installation by securing eave panels along the roof’s edge, ensuring they align with the structure’s perimeter. These panels serve as the foundation for subsequent roofing layers, providing a sturdy base that prevents weather infiltration. Proper alignment is crucial to maintain the roof’s integrity and aesthetic appeal. Use appropriate fasteners to attach the panels firmly to the purlins or roof deck, following the manufacturer’s guidelines. Ensure the panels are tightly sealed at overlaps to prevent moisture penetration. Starting with eave panels sets the stage for a smooth, even installation process, allowing the rest of the roof to be built upon this secure foundation.
6.2 Securing Panels to Purlins
Securing metal panels to purlins is a critical step in ensuring structural integrity and weather-tightness. Begin by aligning the panels with the purlins, ensuring proper fit and alignment. Use self-tapping screws or rivets specifically designed for metal roofing to fasten the panels securely. Tighten the fasteners firmly but avoid overtightening, which can damage the panels or purlins. Start from the center of the panel and work outward to prevent buckling or distortion. Ensure all fasteners are spaced evenly, following the manufacturer’s recommendations for spacing and torque. Properly securing panels to purlins guarantees a stable and durable roof system, capable of withstanding various environmental conditions. Always follow the manufacturer’s guidelines for the specific type of metal roofing material being used.
Adding Flashing
Flashing is essential for sealing joints and preventing water intrusion at roof edges, valleys, and vents. Proper installation ensures long-term durability and weather-tightness of the metal roof system.
7.1 Installing Roof-to-Wall Flashing
Roof-to-wall flashing is crucial for sealing the intersection where the metal roof meets vertical walls, ensuring water tightness and preventing leaks. Begin by measuring the length of the wall where the flashing will be installed. Cut the flashing material to size using a utility knife or metal snips, ensuring it extends slightly beyond the roof’s edge for full coverage. Apply a thin layer of roofing sealant to the back of the flashing and press it firmly against the wall, aligning it with the roof’s edge. Secure the flashing with appropriate fasteners, spaced evenly to maintain a tight seal. Finally, inspect the flashing to ensure proper alignment and adhesion, addressing any gaps or misalignments promptly. This step is vital for maintaining the integrity of the metal roof system.
7.2 Sealing Valleys and Vents
Sealing valleys and vents is essential to ensure a watertight metal roof installation. Valleys, where two roof panels meet, are prone to water accumulation, making them vulnerable to leaks. Begin by thoroughly cleaning the valley area to remove dirt or debris. Apply a high-quality roofing sealant along the length of the valley, spreading it evenly with a caulk gun or brush. For vents, such as those around pipes or chimneys, cut a piece of flashing to fit snugly around the vent. Secure it with roofing screws and apply additional sealant around the edges. Allow the sealant to cure completely before exposing the roof to weather. Proper sealing prevents water infiltration and extends the lifespan of your metal roof.
Installing Ridge Caps and Trim
Ridge caps are installed along the roof’s peak, while trim is added around edges and vents. Both are properly secured to ensure a seamless, watertight finish.
8.1 Cutting and Fitting Ridge Caps
Cutting and fitting ridge caps requires precision to ensure a watertight seal. Measure the ridge length accurately and cut the cap to size using a saw or snips. Align the cap with the roof’s peak, ensuring it fits snugly over the panels. Secure it with compatible fasteners, spacing them evenly. For curved or angled roofs, pre-bend the cap to match the contour. Apply a bead of sealant along the underside for extra protection. Check for proper alignment and tighten all fasteners firmly. If multiple cap sections are needed, overlap them slightly at joints and seal thoroughly. Proper fitting ensures durability and prevents leaks, completing the roof’s aesthetic and functional finish.
8.2 Securing Ridge Caps and Trim
Securing ridge caps and trim is a critical step to ensure a weather-tight and visually appealing finish. Start by aligning the ridge cap with the roof’s peak, overlapping the panels slightly. Use compatible screws or rivets to fasten the cap to the roof structure, spacing them 12-16 inches apart. Avoid overtightening to prevent damage. For trim, measure and cut pieces to fit around edges, vents, and skylights. Attach trim using matching fasteners, ensuring a snug fit. Apply a bead of sealant where trim meets the roof or walls for added protection. Double-check all fasteners for tightness and inspect for gaps or misalignments. Properly secured caps and trim enhance durability and maintain the roof’s integrity, completing the installation process effectively.
Tools and Materials Required
Essential tools include tape measure, snips, hammer, safety gear, and sealant gun. Key materials are underlayment, panels, flashing, and fasteners. Ensure all items are readily available.
9.1 Essential Tools for Installation
Installing a metal roof requires specific tools to ensure accuracy and safety. A tape measure is crucial for measuring roof dimensions and marking panels. Tin snips or a metal shear are necessary for cutting panels to size. A hammer is used for securing panels and fasteners. Safety equipment, such as gloves, safety glasses, and a harness, is essential to prevent injuries. A sealant gun is needed for applying weatherproofing sealants around edges and seams. Additionally, a drill with screwdriver and drill bits may be required for pre-drilling holes or securing panels. Having these tools readily available will streamline the installation process and ensure professional results. Proper tool maintenance is also vital for optimal performance.
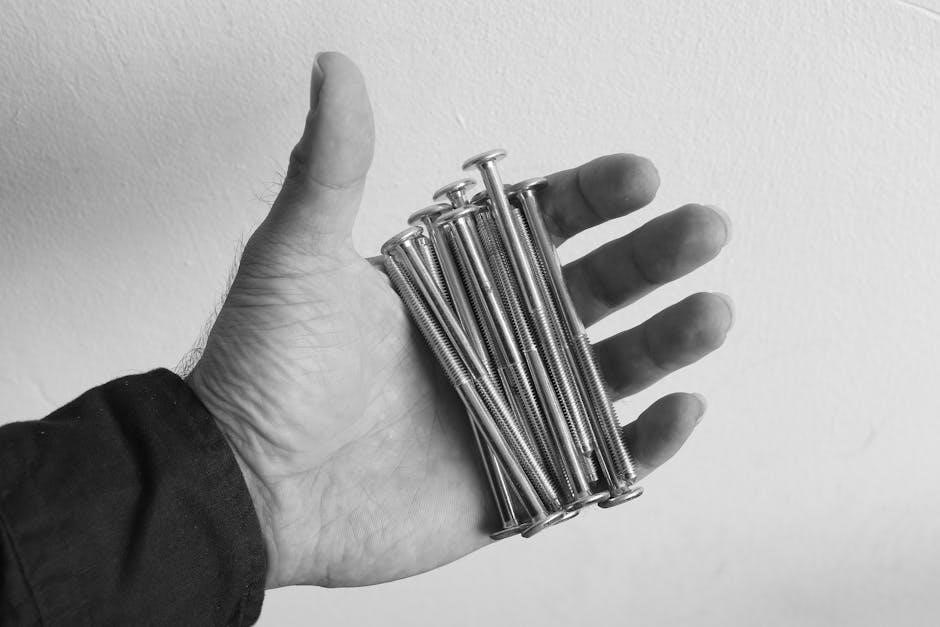
9.2 Recommended Materials
For a successful metal roof installation, high-quality materials are essential. Metal panels, available in various styles like corrugated, standing seam, or box rib, are the primary component; A durable underlayment, such as synthetic or asphalt-based, is required to protect against moisture. Fasteners like screws or nails, specifically designed for metal roofing, ensure secure panel attachment. Flashing materials, such as pre-formed metal or rubber, are vital for sealing valleys, vents, and edges. Weatherproof sealants are applied to prevent leaks at seams and joints. Insulation materials, such as foam board or fiberglass, may be installed beneath the panels to enhance energy efficiency. Ridging caps and trim complete the installation, providing a finished appearance. Always choose materials compatible with your climate and roof type for optimal performance and longevity.
Cost Considerations
Metal roofing costs vary based on materials, labor, and project size. While initial expenses are higher, long-term savings from durability and energy efficiency often offset them.
10.1 Material Costs
Material costs are a significant portion of metal roof installation expenses. Prices vary based on the type of metal, with options like galvanized steel, aluminum, and copper ranging from $7 to $20 per square foot. Underlayment, fasteners, flashing, and trim add to the total. High-quality materials ensure durability and weather resistance. Budget-friendly options like corrugated steel are more affordable, while standing seam systems are pricier due to advanced features. Roof size and complexity also influence costs, as larger or uniquely shaped roofs require more materials. Brand and supplier can affect pricing, so comparing quotes is essential for budgeting accurately.
10.2 Labor Costs
Labor costs for metal roof installation vary depending on location, installer expertise, and roof complexity. On average, labor can range from $3 to $15 per square foot, with DIY projects eliminating these costs. Professional installations often include fees for measuring, cutting, and securing panels, as well as applying underlayment and flashing. Complex roofs with multiple valleys or steep pitches may incur higher labor charges due to increased difficulty and time. Additionally, the type of metal used can influence labor costs, as some systems require specialized tools or techniques. Comparing quotes from licensed contractors is essential to ensure fair pricing and quality workmanship. Labor costs are a significant part of the overall budget, so balancing expertise with affordability is key.
Maintenance and Repair
Regular inspections and cleaning are essential to prevent damage and extend the lifespan of your metal roof. Ensure gutters are clear, and tighten loose fasteners promptly. Addressing minor issues early prevents costly repairs and ensures long-term durability.
11.1 Regular Maintenance Tips
Regular maintenance is crucial to ensure the longevity and performance of your metal roof. Start by inspecting the roof at least twice a year, ideally in spring and fall, to identify potential issues early. Clear debris such as leaves, branches, and dirt from the surface, as these can cause damage or block water flow. Use a soft-bristle brush or a garden hose to clean the roof gently. Check for loose or missing fasteners and tighten or replace them promptly. Inspect for signs of rust or corrosion and treat them immediately to prevent spreading. Ensure gutters and downspouts are clear to maintain proper water drainage. Additionally, trim tree branches near the roof to avoid scratches or dents. Regular maintenance not only protects your investment but also ensures the roof remains structurally sound and visually appealing for years to come.
11.2 Common Repairs
Despite its durability, a metal roof may require occasional repairs to maintain its integrity. Common issues include loose fasteners, scratches, and leaks around flashing or seams. Addressing these promptly is essential to prevent further damage. For loose fasteners, tighten or replace them with compatible screws. Scratches can be touched up with metal-specific paint to prevent rust. Leaks near flashing or seams can often be resolved by resealing with a high-quality sealant. If damage is extensive, such as dented or corroded panels, consider replacing the affected sections. Regular inspections and timely repairs will help extend the lifespan of your metal roof and maintain its performance. Always use materials compatible with your roof type to ensure longevity and weather tightness.
Installing a metal roof is a rewarding project that enhances your home’s durability, energy efficiency, and curb appeal. By following this manual, you’ve gained the knowledge to plan, prepare, and execute a successful installation. Metal roofs offer unparalleled strength, lasting 40–70 years, and require minimal maintenance; Remember to schedule regular inspections and address repairs promptly to ensure optimal performance. Whether you’re a DIY enthusiast or hiring professionals, understanding the process empowers you to make informed decisions. The result is a sleek, modern roof that protects your home for decades while reducing energy costs. Congratulations on completing your metal roof installation journey!